


Cookie-cutter e mail advertising and marketing is straightforward. The draw back, nonetheless, is that doing issues the straightforward method means a variety of different individuals are doing it that method too. You’re right here since you need to do extra with e mail coding. You’ve concepts. You need to take issues additional. You’re able to study some code and check out actual e mail growth
One of the best ways to create high-impact, superbly designed advertising and marketing emails is to skip the generic templates and code your personal distinctive e mail designs as an alternative.
This text will present the whole lot you must find out about utilizing HTML, CSS, and an email-specific coding language referred to as Mailjet Markup Language (MJML). Use this to create one-of-a-kind emails with out bothering with drag-and-drop templates that restrict your creativity. It’s written for each skilled net builders and fewer technical e mail senders who may not know learn how to code.
HTML and CSS would be the best-known technique to code, however MJML is made for coding emails. As you’ll see on this information, there are main variations between net and e mail growth. That’s as a result of every e mail consumer helps completely different subsets of HTML and CSS properties. Since MJML was created particularly for e mail, you possibly can skip over these challenges with out compromising full management over your e mail.
Leap to a bit on this information:

5 issues you must find out about HTML emails
Chances are you’ll not have a background in growth, however that doesn’t imply you possibly can’t degree up your emails with a little bit of coding. If phrases like HTML and CSS are new to you, listed here are a couple of fundamental ideas to prime you on creating emails in HTML.

HTML stands for “HyperText Markup Language.” It’s the language used to offer the construction for web sites and emails. You’ll be able to consider it as the inspiration, beams, and ceilings of a home.

CSS stands for “Cascading Model Sheets.” It’s what we use to type our emails. If HTML is just like the construction of a home, CSS is just like the paint, polish, and art work that makes the home distinctive and engaging.

HTML and CSS coding for e mail may be very completely different than HTML and CSS coding for the net. Net browsers like Chrome and Safari share standardized HTML and CSS properties, whereas e mail shoppers don’t. This implies creating emails with HTML and CSS is especially tough.

As a result of e mail shoppers range within the HTML and CSS they help, we are able to solely use a subset of HTML and CSS when coding our e mail. Particularly, this implies utilizing <tables> for our construction and inline kinds for our CSS. We’ll go into extra element on what meaning under.

Most individuals flip to HTML because the default for creating buyer emails, but it surely’s not the one possibility. We’ll present you a useful different to coding in HTML and CSS referred to as MJML that may make your life a lot simpler whereas nonetheless offering all the advantages of coding in HTML and CSS.
For a extra detailed rundown of HTML and CSS, try these wonderful programs from Codecademy. However should you’re solely fascinated about utilizing them to create and ship emails, you’re precisely the place you must be.

The anatomy of typical HTML emails
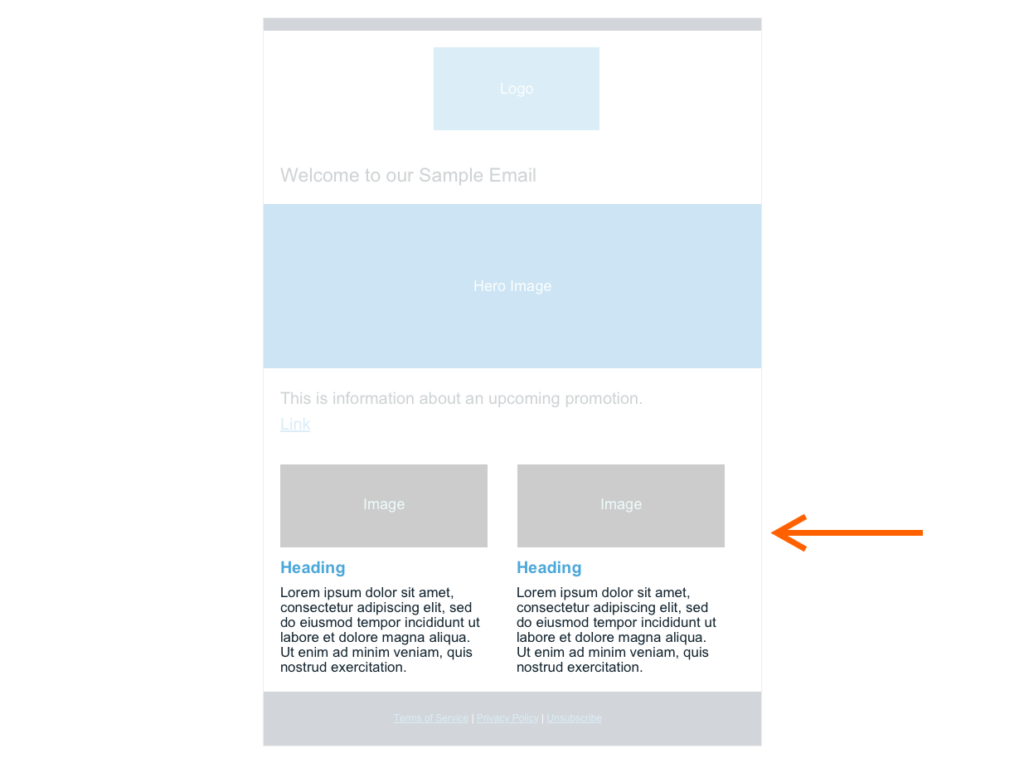
We’re going to stroll you thru learn how to construct a responsive e mail utilizing HTML and CSS. Earlier than we begin coding, although, we want a transparent image of what we’ll construct.
Right here’s a fundamental mock-up of a regular e mail that we’re going to construct in HTML under:
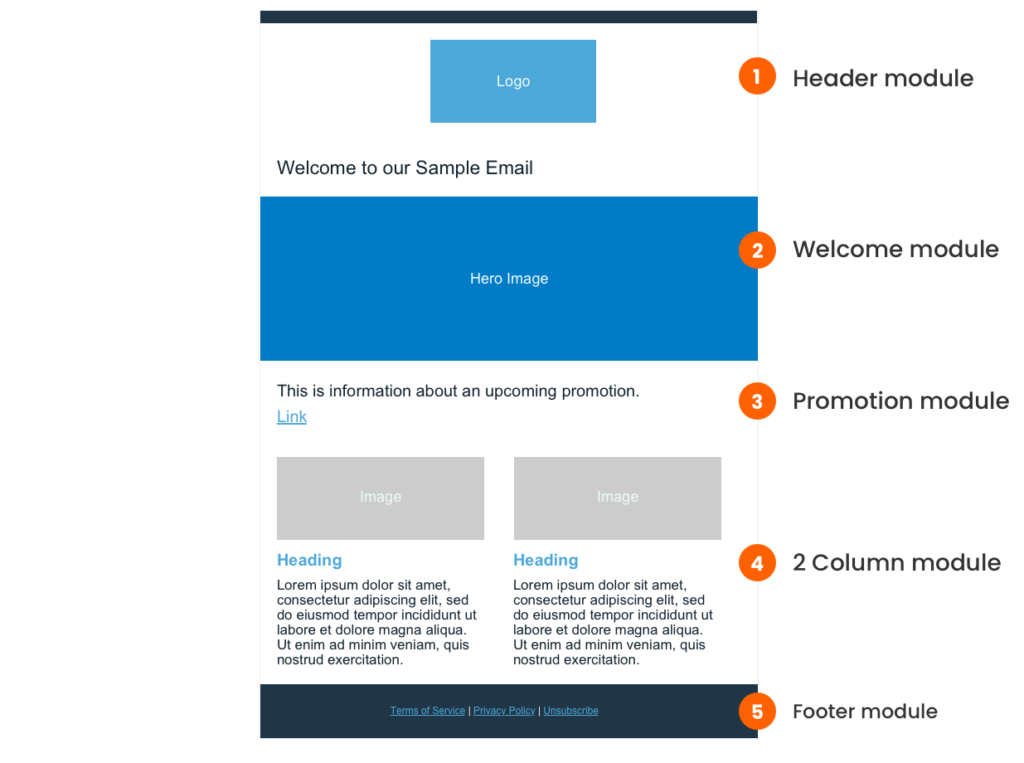
You’ll discover that to assist maintain issues organized and simply create a template from our code sooner or later, the mock-up breaks down into 5 completely different sections, or “modules”. We’ll check out every of these modules in addition to the essential HTML construction you’ll have to get began.
Leap to one of many 7 steps:
- HTML e mail doc
- Outer tables
- Header module
- Welcome module
- Promotion module
- Two-column module
- Footer module
We’ll code every of those modules one after the other within the tutorial under.
Find out how to create the HTML construction on your emails
Each HTML e mail you create will begin with the identical fundamental construction. Let’s check out it:
Step 1: Create your HTML e mail doc
At a excessive degree, this block of code lets browsers know you’re coding in HTML and gives some further configuration data to assist the e-mail shoppers or net browsers render your code accurately. Don’t fret in regards to the particulars right here: Most builders simply copy-and-paste this code from e mail to e mail. However for these , right here’s a quick rundown of this code.
<!DOCTYPE html>
<html lang="en" xmlns="http://www.w3.org/1999/xhtml" xmlns:v="urn:schemas-microsoft-com:vml" xmlns:o="urn:schemas-microsoft-com:workplace:workplace">

 <head>
   <meta charset="utf-8">
   <meta http-equiv="X-UA-Suitable" content material="IE=edge">
   <meta title="viewport" content material="width=device-width,initial-scale=1 user-scalable=sure">
   <meta title="format-detection" content material="phone=no, date=no, deal with=no, e mail=no, url=no">
   <meta title="x-apple-disable-message-reformatting">
   <meta title="color-scheme" content material="gentle darkish">
   <meta title="supported-color-schemes" content material="gentle darkish">

   <title>Electronic mail title</title>

   <!--[if mso]> <noscript> <xml> <o:OfficeDocumentSettings> <o:PixelsPerInch>96</o:PixelsPerInch> </o:OfficeDocumentSettings> </xml> </noscript> <![endif]-->

   <type>
    :root { color-scheme: gentle darkish; supported-color-schemes: gentle darkish; }
   </type>
 </head>
 <physique>
      *** We’ll construct the content material of our e mail right here ***
 </physique>
</html>
After that, we have now our <head> tags. The <head> incorporates <meta> tags which give configuration data, a <title> tag, which is the place the title of our e mail goes, some Microsoft-specific instructions, and a few type code to help client-specific coloration schemes.
On the high of this code block, we declare our doctype, which lets e mail shoppers know to anticipate HTML. From there, we open our <html> tag. You’ll discover that this tag incorporates some XML namespace data that additional instructs the browser on learn how to render our e mail accurately.
Lastly, we have now our <physique> tags, the place we create the e-mail’s content material and design. We’ll be doing most of our coding inside these <physique> tags.
Step 2: Create your outer tables
Now that we have now our HTML doc, let’s begin coding the content material of our e mail inside the <physique> tags.
When writing HTML and CSS for the net, we are able to use CSS properties like flexbox, grid, and extra to deal with our format. Sadly, e mail shoppers don’t constantly acknowledge frequent CSS properties, so we are able to’t depend on CSS for e mail format. This implies we have to use HTML <tables> as an alternative. HTML <tables> are a part that enable us to place our content material in rows and columns. Sadly, since these tables had been designed to show information (assume: information tables), it takes some finessing to get them to look good.
Earlier than we get into learn how to use <tables> to code our e mail, let’s break down the essential construction of an HTML desk.
Right here’s a easy instance:
<desk type="width:100%" border="strong">
 <tr>
   <td>Column 1</td>
   <td>Column 2</td>
   <td>Column 3</td>
 </tr>
</desk>
On this code instance, we have now three completely different tag sorts:
- <desk> which defines our desk
- <tr> which stands for “desk row”
- <td> which stands for “desk information” and is mainly a column
The above code pattern additionally provides us our first glimpse of inline kinds. You’ll be able to see we’ve used the “type” attribute to present our desk a width of 100%.
Right here’s the desk that the above code creates:
That appears easy sufficient, however we have now to warn you that nesting tables for format opens a complete can of worms. As we begin to nest tables inside tables inside tables, it’s simple to lose observe of the place you might be in your code. There are various “type hacks” you must implement to make the format look trendy and interesting.
To maintain issues so simple as doable for this tutorial, we’ll add in the usual inline kinds wanted for fundamental formatting proper off the bat. You’ll be able to copy and paste these inline kinds from e mail to e mail that you simply create. Within the subsequent part, we’ll information you thru learn how to add extra customized customized kinds to your HTML to get our design trying similar to the mock-up.
Within the code pattern under, you possibly can see we have now pasted two nested tables with some default formatting kinds hooked up to them inside our <physique> tags.
<physique>
 <desk cellpadding="0", cellspacing="0", border="0" type="width:100%; background:#ffffff; border-collapse:collapse; border-spacing:0; border: 0;" position="presentation">
   <tr>
     <td type="padding:0; text-align: heart;">
       <desk cellpadding="0", cellspacing="0", border="0" type="border:1px strong #eeeeee; width:600px; border-collapse:collapse; border-spacing:0; text-align:left;" position="presentation">
         <tr>
           <td>
               *** all our e mail content material will go right here ***
           </td>
         </tr>
       </desk>
     </td>
   </tr>
 </desk>
</physique>
These two tables work collectively to offer a construction with a width of 600px and centered with a white (or #ffffff) background. We assign every desk a task of “presentation” to point that these tables are for styling functions, versus being information tables.
The interior desk has a skinny, 1px gentle grey (or #eeeeee) border. We discover it useful to have a border on the desk when creating it so we are able to see our boundaries. You’ll be able to delete the border on the finish should you’d like.
To date, we’ve already written a variety of code, however we don’t have a lot to point out for it but.
Right here’s what our e mail seems to be like to date:

Coding emails in pure HTML and CSS isn’t for the faint of coronary heart! Don’t get discouraged, although. On the finish of this tutorial, we’ll present you ways you should use MJML to make your life a lot simpler when coding for e mail. For now, let’s proceed our deep dive into HTML and begin creating your e mail content material.
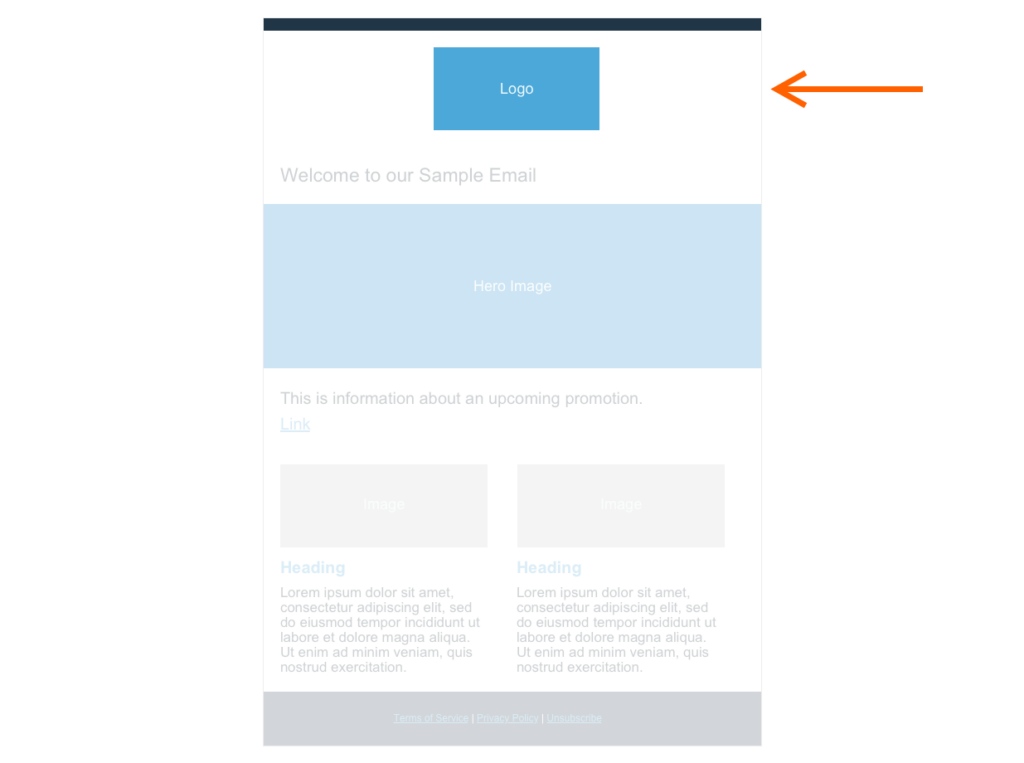
Going again to our mock-up, we are able to see that our header module consists of an ornamental darkish blue line on the high and our brand.
We’ll include the code for these two components in — you guessed it — one other nested desk. This desk replaces the placeholder message “*** all our e mail content material will go right here ***” in our above code pattern. So it’s nested three ranges deep.
Right here’s what the code seems to be like:
<!-- Header -->
<desk class="header-module" position="presentation" type="width:100%; border:0; border-collapse:collapse; border-spacing:0;">
 <tr>
   <!-- divider -->
   <td class="divider"> </td>
 </tr>
 <tr>
   <!-- brand -->
   <td class="brand">
     <img type="" src="https://through.placeholder.com/200x100/cccccc/4DA8DA/?textual content=Brand" />
   </td>
 </tr>
</desk>
Within the code above, you’ll discover we added feedback to assist us perceive what every part of our code does. Feedback are contained between <!- – – – >. We will write something we like as feedback. The aim of them is to maintain our code clear and comprehensible.
The desk within the code above has the identical position and elegance attributes as our earlier tables. We additionally added a “class” attribute. Since we have to depend on inline kinds reasonably than CSS for e mail coding, this class isn’t technically vital. Nonetheless, they’re useful as an added label to maintain observe of the aim of every module and part inside the module. In the event you’re unfamiliar with the category attribute and need to study extra about how they’re utilized in net growth, you possibly can learn extra about them. For our functions in e mail coding, although, they’re primarily only a title tag.
For the brand on this tutorial, we grabbed a placeholder picture from placeholder.com. After all, you’ll need to swap out the supply (src attribute) for the right URL to your personal brand.
Now that we’ve written the code above, right here’s how our e mail seems to be to date:

Not very fairly! Our divider isn’t even seen and the brand isn’t centered. As soon as we’re executed constructing the HTML construction for all our elements, we’ll present you learn how to use inline kinds to make it look a lot better.
Step 4: Create the construction on your Welcome Module
Now it’s time for our welcome module. As a reminder, our welcome module consists of some textual content and a hero picture.
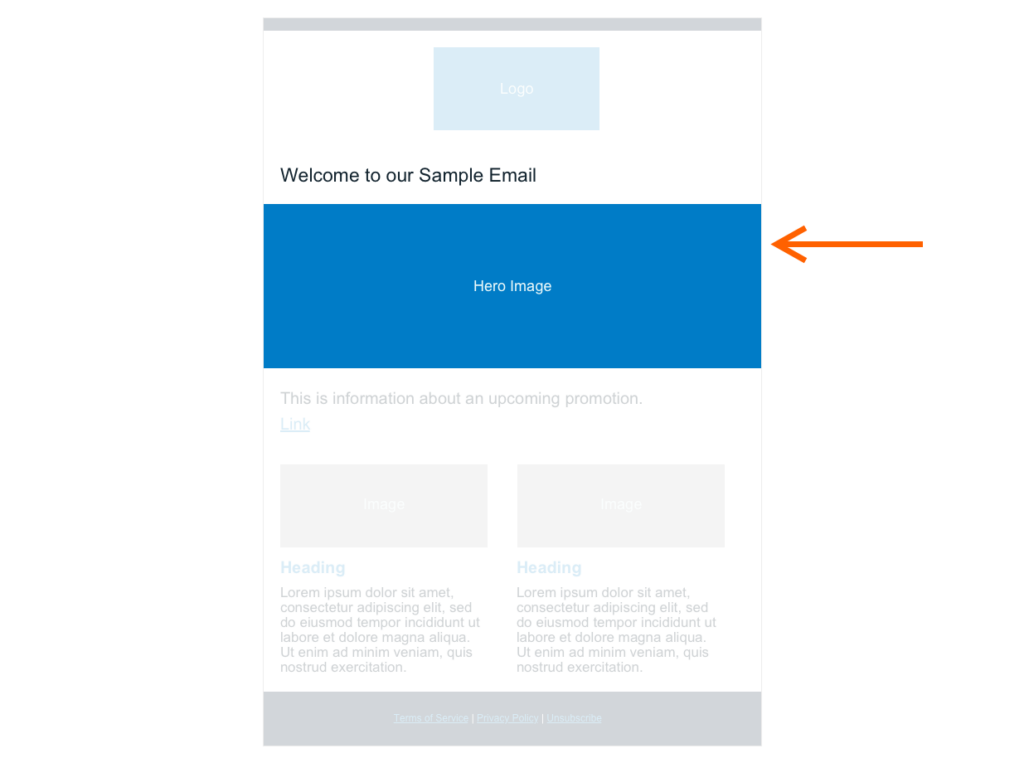
Right here’s what the e-mail coding seems to be like:
<!-- Welcome Module -->
<desk class="welcome-module" position="presentation" type="width:600px;border:0;border-collapse:collapse;border-spacing:0;">
 <tr>
   <!-- Welcome Textual content -->
   <td class="welcome-text" type="">
     <h1>Welcome to our Pattern Electronic mail</h1>
    </td>
  </tr>
  <tr>
    <!-- Hero Picture -->
    <td class="hero-image">
      <img src="https://through.placeholder.com/600x200/cccccc/EEFBFB/?textual content=Hero Picture" />
        </td>
   </tr>
</desk>
By now, the outer desk ought to look acquainted. It has the identical position and elegance attributes as all our different desk modules, and it additionally has a category to assist us simply inform its objective. Inside our desk are <td>s that we’ve additionally given useful class names to.
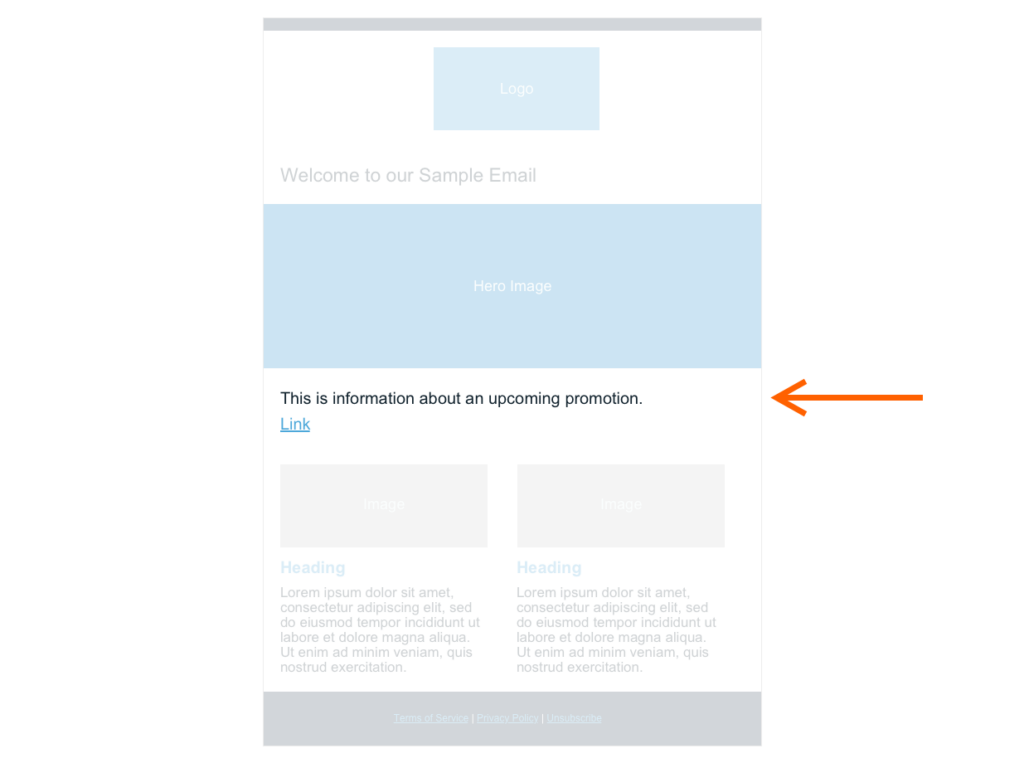
Since we haven’t but written any inline kinds, our e mail isn’t very fairly but, however our construction is coming alongside properly!
Step 5: Create the construction on your upcoming Promotion Module
This module is just like our welcome module, however as an alternative of pairing textual content with a hero picture, we pair our textual content with a button.
Right here’s the e-mail code:
<!-- Upcoming Promotion Module -->
<desk class="upcoming-promotion-module" position="presentation" type="width:600px;border:0;border-collapse:collapse;border-spacing:0;">
 <tr>
   <!-- Upcoming Promotion Textual content -->
   <td class="upcoming-promotion-text">
     <h2>That is details about an upcoming promotion.</h2>
   </td>
  </tr>
  <tr>
    <!-- Upcoming Promotion Button -->
    <td class="upcoming-promotion-button" type="">
      <a href="https://www.instance.com" class="button">Hyperlink</a>
     </td>
  </tr>
</desk>
On this module, we use an <a> tag for our button. Make sure you change the pound image we have now within the href attribute with the right URL you need the button to hyperlink to.
Step 6: Create the construction on your Two-Column Module
Now that we’re warmed up, let’s construct a module that’s a bit of extra difficult.
Right here’s the code for our two-column module:
<!-- Two Column Module -->
<desk class="two-column-module" position="presentation" type="width:100%;border:0;border-collapse:collapse;border-spacing:0;">
<tr>
<!-- Left Column -->
<td class="left-column column" type="">
<img src="https://through.placeholder.com/250x100/cccccc/EEFBFB/?textual content=Picture" />
<a category="columnHeading" href="#"><h3>Heading</h3></a>
<p>Ut enim advert minim veniam, quis nostrud exercitation ullamco laboris nisi ut aliquip ex ea commodo consequat. Duis aute irure dolor in reprehenderit in voluptate velit esse cillum dolore eu fugiat nulla pariatur.</p>
</td>
<!-- Gutter -->
<td class="gutter" type=""> </td>
<!-- Proper Column -->
<td class="right-column column" type="">
<img src="https://through.placeholder.com/250x100/cccccc/EEFBFB/?textual content=Picture" />
<a category="columnHeading" href="#"><h3>Heading</h3></a>
<p>Ut enim advert minim veniam, quis nostrud exercitation ullamco laboris nisi ut aliquip ex ea commodo consequat. Duis aute irure dolor in reprehenderit in voluptate velit esse cillum dolore eu fugiat nulla pariatur.</p>
</td>
</tr>
</desk>
As you possibly can see, we use a <td> for every column, with one other <td> between them to function a gutter. As we’ve talked about earlier, completely different e mail shoppers deal with CSS properties in numerous methods. Be aware – should you’re focusing on variations of Microsoft Outlook sooner than 2019, then you definitely’ll want to enhance the code proven above with “ghost tables.” Electronic mail on Acid has a nice tutorial on learn how to use ghost columns
Whereas this two-column module seems to be nice on bigger screens like computer systems and tablets, you may discover that you simply’d prefer to make it responsive and have the columns stack on high of one another on smaller telephone screens. We will do that utilizing CSS media queries. Media queries are CSS properties that enable us to use sure kinds solely when a selected display dimension situation is met.
Right here’s a easy instance:
<type>
 h1 {
   coloration: pink;
 }

 @media solely display and (max-width: 600px) {
    h1 {
      coloration: blue;
    }
 }
</type>
On this instance, we’re saying we would like all content material in <h1> tags to be coloured pink. Nonetheless, if the consumer is studying our e mail on a telephone that has a display 600px or smaller, then make all content material inside <h1> tags blue as an alternative. This – like all CSS – is a good characteristic.
Sadly, not all e mail shoppers help CSS media queries and even the type tags we have to put them in. That’s why it’s all the time vital to ensure that your e mail will nonetheless be readable for shoppers with out the responsive expertise. In our case, these two columns look OK on telephones.
So whereas our media queries enable us to offer an enhanced expertise for e mail shoppers that help it, the two-column fallback works acceptably effectively for the e-mail shoppers that don’t.
We’ll add our media question inside <type> tags up in our <head> proper under our <meta> tags.
Right here’s what it seems to be like:
<head>
   <title>
   </title>
   <meta http-equiv="Content material-Kind" content material="textual content/html; charset=UTF-8">
   <meta title="viewport" content material="width=device-width, initial-scale=1">
   <type>
     @media solely display and (max-width: 600px) {
       .column,
       .gutter {
         show: block !vital;
       }

       .column {
         width: 450px !vital;
       }

       .column img {
         width: 450px;
       }
     }
   </type>
 </head>
Since we’re writing CSS inside our media question, we are able to lastly use our lessons for one thing extra than simply title tags. Discover that we apply kinds to our columns and gutter by referring to their class names preceded by a interval in our CSS.
We’ve made it to our remaining module — the footer. We’ll be following the identical rules we’ve been utilizing all alongside.
Right here’s what the code seems to be like:
<!-- Footer Module -->
<desk class="footer-module" position="presentation" type="width:100%;border:0;border-collapse:collapse;border-spacing:0;">
 <tr>
   <td>
     <a task="button" href="#">Phrases of Service</a> | <a href="#">Privateness Coverage</a> | <a href="#">Unsubscribe</a>
    </td>
 </tr>
</desk>
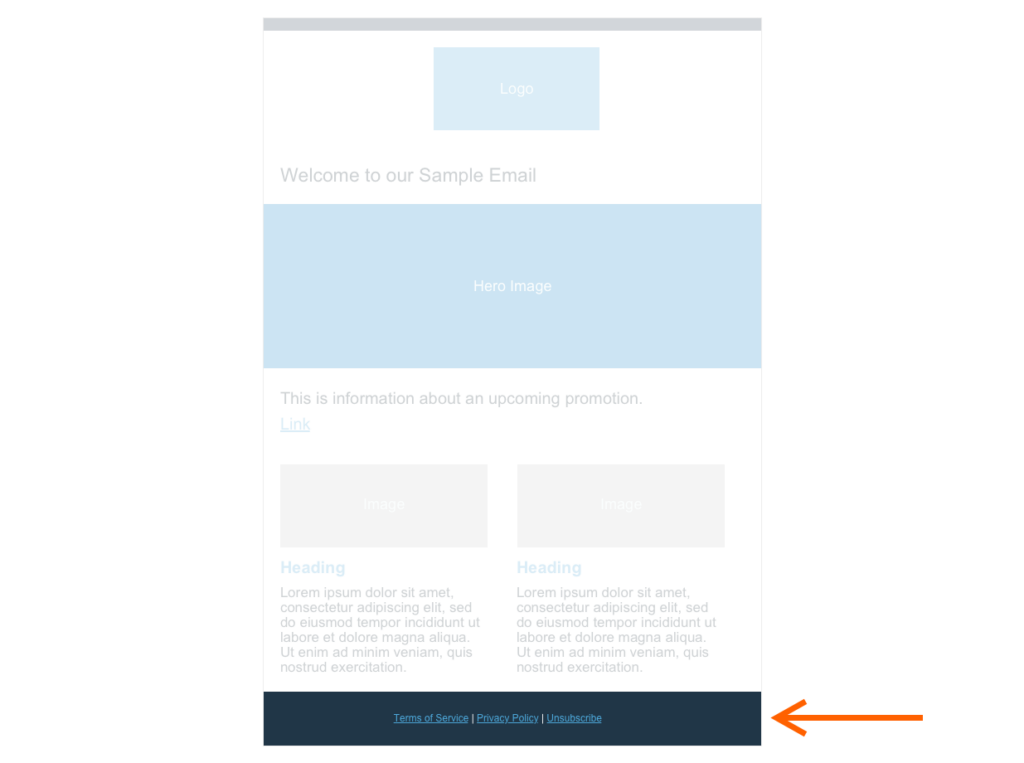
Whew! That was a variety of code we simply wrote. The excellent news is, we’re executed with constructing our construction and are prepared to begin including our inline kinds. And boy, does our e mail want some styling.
Right here’s the way it seems to be to date:
Find out how to apply inline CSS kinds to your e mail
Our e mail is in determined want of some styling.
Right here’s why:
- Font dimension, household, and coloration are all unsuitable
- Content material is pressed up in opposition to the left edge
- Two-column module has spanned effectively past our 600px e mail width.
- Ornamental high line is lacking
- Footer doesn’t have a background coloration
- Spacing between components is inconsistent
Let’s check out how inline CSS kinds assist deal with every of these.
As we talked about earlier, completely different e mail shoppers help completely different CSS properties. Subsequently, the very first thing we suggest is checking which CSS your e mail consumer helps.
We’ll take a conservative strategy and rely solely on inline kinds to deal with our styling wants.
Let’s return to our header module. As you’ll recall, our divider doesn’t appear to point out up, and our brand isn’t centered. Let’s repair that.
Right here’s the code for our header module once more. Discover how we’ve stuffed within the type attributes on the divider and brand <td>s.
<!-- Header Module -->
<desk class="header-module" position="presentation" type="width:100%; border:0; border-collapse:collapse; border-spacing:0;">
<tr>
<!-- Divider -->
<td class="divider" type="font-size: 4px; background:#203647"> </td>
</tr>
<tr>
<!-- Brand -->
<td class="brand" type="padding: 20px 0px 0 0px; text-align: heart;">
<img type="" src="https://through.placeholder.com/200x100/4da8da/EEFBFB/?textual content=Brand" />
</td>
</tr>
</desk>
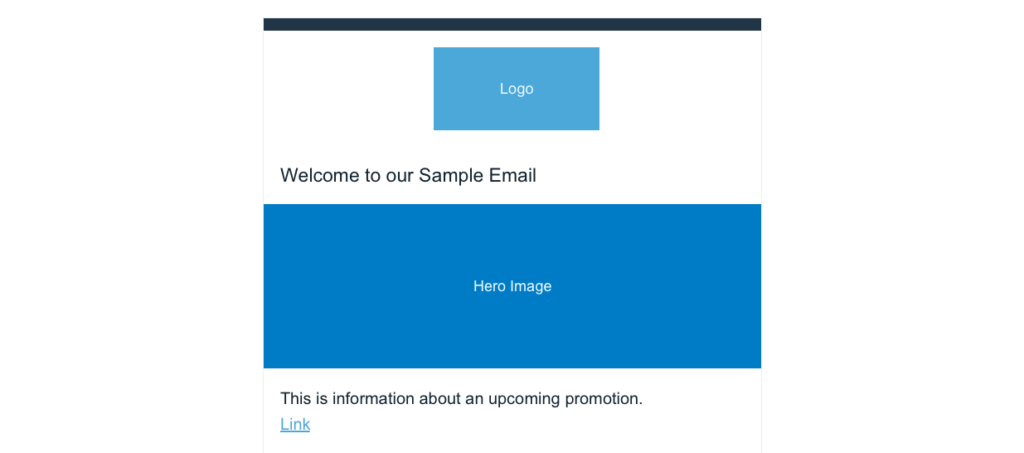
We’ve given our divider some peak utilizing a non-breaking area ( ) and a font-size of 4px. Then we added a background coloration of #203647. We offer some area between our brand and divider by giving our brand 20px of high padding, after which we heart it utilizing text-align.
Issues are beginning to look a lot better:

Now let’s transfer on to our welcome module. Whereas the essential construction we put collectively was a terrific begin, we have to enhance the styling by giving our components some respiratory room. We additionally want to regulate our font.
Right here’s the code with our new inline kinds added in:
<!-- Welcome Module -->
<desk class="welcome-module" position="presentation" type="width:600px;border:0;border-collapse:collapse;border-spacing:0;">
 <tr>
   <!-- Welcome Textual content -->
   <td class="welcome-text" type="padding: 0px 30px 0 30px;">
     <h1 type="font-size:24px; padding: 0; font-family: Arial, sans-serif; coloration:#12232E; font-weight: regular;">Welcome to our Pattern Electronic mail</h1>
    </td>
  </tr>
  <tr>
    <!-- Hero Picture -->
    <td class="hero-image">
As you possibly can see, we proceed to make use of padding to area our components out. We modify the font-family, font-size, and font-weight on our textual content, and we guarantee our hero picture spans all the width of our e mail.
We’re making nice progress. The modules to which we’ve added our inline kinds are trying like our mock-up now:

Now let’s apply some kinds to our promotion module.
Right here’s the code with our added inline kinds:
<!-- Upcoming Promotion Module -->
<desk class="upcoming-promotion-module" position="presentation" type="width:600px;border:0;border-collapse:collapse;border-spacing:0;">
 <tr>
   <!-- Upcoming Promotion Textual content -->
   <td class="upcoming-promotion-text" type="padding: 0 30px 0 30px; coloration: #12232E">
     <h2 type="font-size:20px; padding: 0; font-family: Arial, sans-serif; coloration:#12232E; font-weight: regular;">That is details about an upcoming promotion.</h2>
   </td>
   </tr>
   <tr>
     <!-- Upcoming Promotion Button -->
     <td class="upcoming-promotion-button" type="padding:0px 30px 30px 30px;">
       <a task="button" href="#" type="coloration: #4DA8DA;" class="button">Hyperlink</a>
      </td>
   </tr>
</desk>
Our textual content kinds are just like what we added to our welcome module, though the font dimension is 20px reasonably than 24px. For our button, we gave it some respiratory room with padding after which modified the colour to #4DA8DA. Trying good!
Our two-column module requires a bit extra inline kinds than our different modules have.
Right here’s the code with the kinds added in:
<!-- Two Column Module -->
<desk class="two-column-module" position="presentation" type="width:100%;border:0;border-collapse:collapse;border-spacing:0;">
<tr>
<!-- Left Column -->
<td class="left-column column" type="width: 250px; coloration: #12232E; padding-left: 30px;">
<img src="https://through.placeholder.com/250x100/cccccc/EEFBFB/?textual content=Picture" />
<a category="columnHeading" href="#" type="coloration: #4DA8DA; text-decoration: none; font-size: 16px; font-family: Arial, sans-serif; ">
<h3>Heading</h3>
</a>
<p type="font-family: Arial, sans-serif;">Ut enim advert minim veniam, quis nostrud exercitation ullamco laboris nisi ut aliquip ex ea commodo consequat. Duis aute irure dolor in reprehenderit in voluptate velit esse cillum dolore eu fugiat nulla pariatur.</p>
</td>
<!-- Gutter -->
<td class="gutter" type="width: 20px; padding: 0; font-size: 0; line-height: 0;">
</td>
<!-- Proper Column -->
<td class="right-column column" type="width: 250px; coloration: #12232E; padding-right: 30px;">
<img src="https://through.placeholder.com/250x100/cccccc/EEFBFB/?textual content=Picture" />
<a category="columnHeading" href="#" type="coloration: #4DA8DA; font-size: 16px; font-family: Arial, sans-serif; ">
<h3>Heading</h3>
</a>
<p type="font-family: Arial, sans-serif;">Ut enim advert minim veniam, quis nostrud exercitation ullamco laboris nisi ut aliquip ex ea commodo consequat. Duis aute irure dolor in reprehenderit in voluptate velit esse cillum dolore eu fugiat nulla pariatur.</p>
</td>
</tr>
</desk>
We begin off by containing our columns, which had been extending past our 600px e mail width, by giving every column a width of 250px. We give our left column some padding-left and our proper column some padding-right in order that the content material has some respiratory room.
We type our column headings by giving them a coloration of #4DA8DA. We then modify the font of each our column headings and the textual content beneath them.

The very last thing we have to do now could be type our footer module.
Right here’s what the code seems to be like with our inline kinds added in:
<!-- Footer Module -->
<desk class="footer-module" position="presentation" type="width:100%;border:0;border-collapse:collapse;border-spacing:0;">
 <tr class="full-width-background" type="background-color: #203647; text-align: heart;">
   <td class="footer-links"  type="padding: 20px 0 20px 0; coloration:#EEFBFB; font-size: 12px;">
     <a method="coloration:#4DA8DA; font-family: Arial, sans-serif; text-decoration: none;" href="#">Phrases of Service</a> |
     <a method="coloration:#4DA8DA; font-family: Arial, sans-serif; text-decoration: none;" href="#">Privateness Coverage</a> |
     <a method="coloration:#4DA8DA; font-family: Arial, sans-serif; text-decoration: none;" href="#">Unsubscribe</a>
   </td>
 </tr>
</desk>
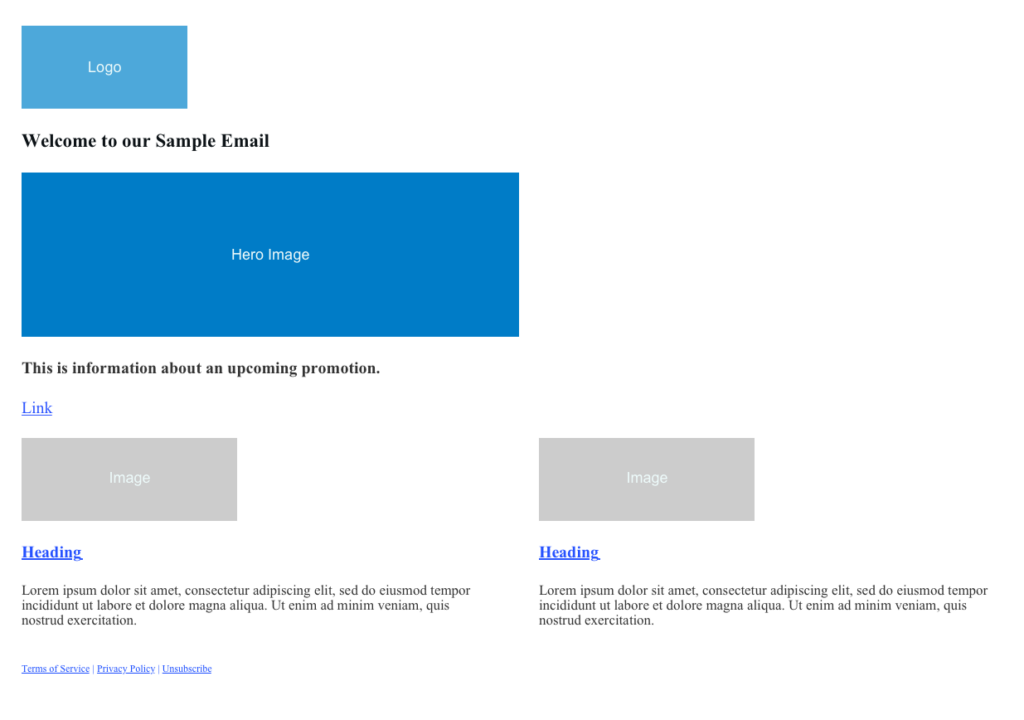
Our footer has a full-width background, so we give {that a} background coloration of #203647. Then, we use text-align to make sure our footer content material is centered. Our footer will get its peak from the padding we add to our footer-links <td>, after which every hyperlink has our model colours and font added. Right here’s our remaining e mail:

Our HTML e mail got here out nice! It took a variety of work, however now you know the way to code your personal emails in HTML and CSS. If you wish to take your CSS even additional, we suggest testing this nice information – The definitive information to CSS animation in e mail.
Find out how to create interactive content material with HTML
So now we have now a great-looking e mail, however maybe you’re questioning should you can add interactive content material, resembling hotspots or hover animation to your e mail. Sadly, we usually don’t suggest including interactive content material to emails. In contrast to web sites, e mail shoppers don’t help JavaScript, which is usually how trendy interactive content material is created.
There are some workarounds, however these received’t work on telephones and different contact screens. So should you do use these workarounds so as to add interactive content material, be sure that your e mail nonetheless works and all-important content material is offered for units that don’t help it.
Find out how to check your responsive HTML e mail
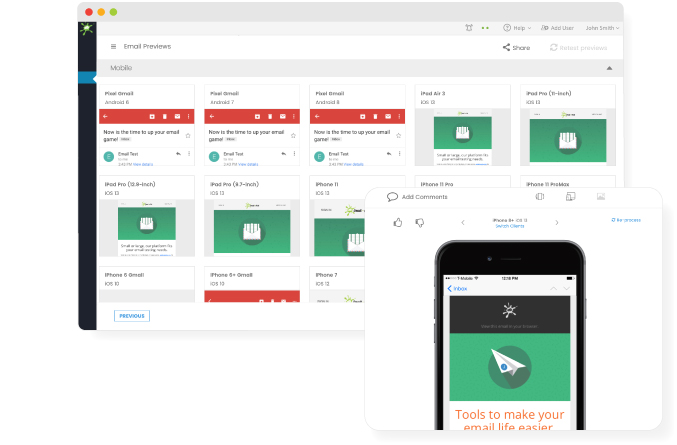
Since e mail shoppers are so variable, it’s important to check your HTML emails earlier than sending them out to your e mail lists. There are a number of instruments you should use to do that, resembling Electronic mail on Acid.
Electronic mail on Acid lets you preview emails to verify they appear the way in which you need on a number of e mail shoppers, but it surely additionally has pre-deployment checklists, content material checkers, and spam assessments.
Find out how to construct a responsive e mail template with MJML
Fortuitously, since every of the modules we created in our tutorial is contained in its personal <desk>, that is simple to do. Merely save the modules together with the doc construction we created earlier in a textual content file. Once you create your subsequent e mail, copy-and-paste the modules you want into your new e mail. Simply change the textual content, hyperlinks, and pictures as vital.
As you proceed to design extra emails with new and completely different modules, you’ll construct up a “module library” that you may decide and select from to reuse sooner or later. Contemplating the trouble that goes into creating an HTML e mail from scratch, it’s effectively price holding this sort of template.
Alternatively, you may take into account a route that doesn’t require a lot effort: coding emails in MJML.

Find out how to code responsive emails in MJML
Now you know the way difficult it’s to create nested tables and inline kinds required for coding HTML emails. Perhaps you’re questioning if there’s a technique to get the advantages of coding your self, with out all the effort. That’s the place MJML (aka Mailjet Markup Language) is available in.
MJML is a straightforward, easy-to-understand markup language designed by Mailjet particularly for coding responsive emails. It lets you code emails with out worrying about what all of the completely different e mail shoppers help and without having to nest tables inside tables inside tables. Try our article on learn how to get began with MJML for extra.
At a excessive degree, we are able to use MJML to put in writing clear, easy-to-understand code that the MJML compiler routinely transforms into nested HTML tables, inline kinds, and hacky workarounds. It takes under consideration fallbacks for various e mail shoppers and is aware of completely different display sizes.
There’s additionally a free on-line editor we are able to use to put in writing our MJML. This on-line editor routinely converts our MJML into HTML and CSS and lets us preview how our e mail seems to be in real-time. Strive it out on one of many modules we created above.
Once you first go to the editor, you’ll see a “good day world” instance.
Let’s examine that “good day world” code:
<mjml>
 <mj-body>
   <mj-section>
     <mj-column>

       <mj-image width="100px" src="https://www.emailonacid.com/property/img/logo-small.png"></mj-image>

       <mj-divider border-color="#F45E43"></mj-divider>

       <mj-text font-size="20px" coloration="#F45E43" font-family="helvetica">Hiya World</mj-text>

     </mj-column>
   </mj-section>
 </mj-body>
</mjml>
The very first thing we need to draw your consideration to is the outermost tag <mjml>. This tag routinely provides the doctype declaration, head tag, and all of the meta data we would have liked so as to add by hand when coding in HTML.
The subsequent tag is <mj-body>. That is the place we’ll write all our e mail code. Most MJML code that we write can even be contained inside <mj-section>s inside the <mj-body> tag.
Fairly than strolling you thru all the MJML tags, we’ll refer you to their wonderful documentation.
To get a good higher sense of how simple coding in MJML is, let’s rebuild our header module utilizing MJML.
Right here’s what the code we’ll put inside our <mj-section> to create our header module seems to be like:
<mj-column>
 <mj-divider border-color="#203647"></mj-divider>
 <mj-image width="200px" src="https://through.placeholder.com/200x100/4da8da/EEFBFB/?textual content=Brand"></mj-image>
</mj-column>
Trying on the code, we are able to simply see what’s occurring. We’ve wrapped our divider and picture in a column. Then we added a few easy-to-understand kinds: border-color for the divider and width for the picture. And that’s all we have to do – our header module is now executed.
In the event you’re following alongside by coding within the MJML editor, we encourage you to click on the “View HTML” button within the higher proper nook of the editor. In the event you try this, you’ll see that the ten strains of MJML we simply wrote are expanded into 133 strains of HTML and CSS. That’s as a result of MJML routinely gives fallbacks and optimizations for a lot of e mail shoppers and use instances. Which means that the code we write in MJML works even higher for all these difficult edge instances than the code we wrote ourselves in HTML and CSS.
Coding responsive emails is one of the best ways to make sure your e mail designs are distinctive, on-brand, and stand out from the competitors. However coding in HTML and CSS is time-consuming and generally unreliable. Fortuitously, MJML provides us all the advantages of coding emails by hand in a fraction of the time with none of the complications that often associate with HTML and CSS e mail coding.
Get assist navigating e mail’s complexities
By now it ought to be clear… e mail coding can rapidly get difficult. When you’ve bought the essential steps down, there may be nonetheless so much that may go unsuitable, particularly with e mail consumer inconsistencies.
That’s why so many e mail builders conduct pre-send testing to preview their work earlier than anybody hits the ship button.
Electronic mail on Acid presents limitless testing, so should you’re simply studying learn how to code emails, you possibly can work by means of the whole lot till you get it proper. The platform additionally consists of checks for inbox show, deliverability, and accessibility. There are even steps for checking hyperlinks, photographs, and spelling.
Discover out extra about why it is best to check each e mail marketing campaign each time. There are 12 superb causes.

Creator: The Electronic mail on Acid Workforce
The Electronic mail on Acid content material staff is made up of digital entrepreneurs, content material creators, and straight-up e mail geeks.
Join with us on LinkedIn, comply with us on Fb, and tweet at @EmailonAcid on Twitter for extra candy stuff and nice convos on e mail advertising and marketing.